Mad Max Models
Models inspired by the Mad Max movies.
Mad Max Models
Monday 9 November 2015
Some dents and dings were added to some panels.
The bodywork has some rusted through metalwork added.....
....and the compulsory 'Immortan Joe' flaming skull added to the front grill.
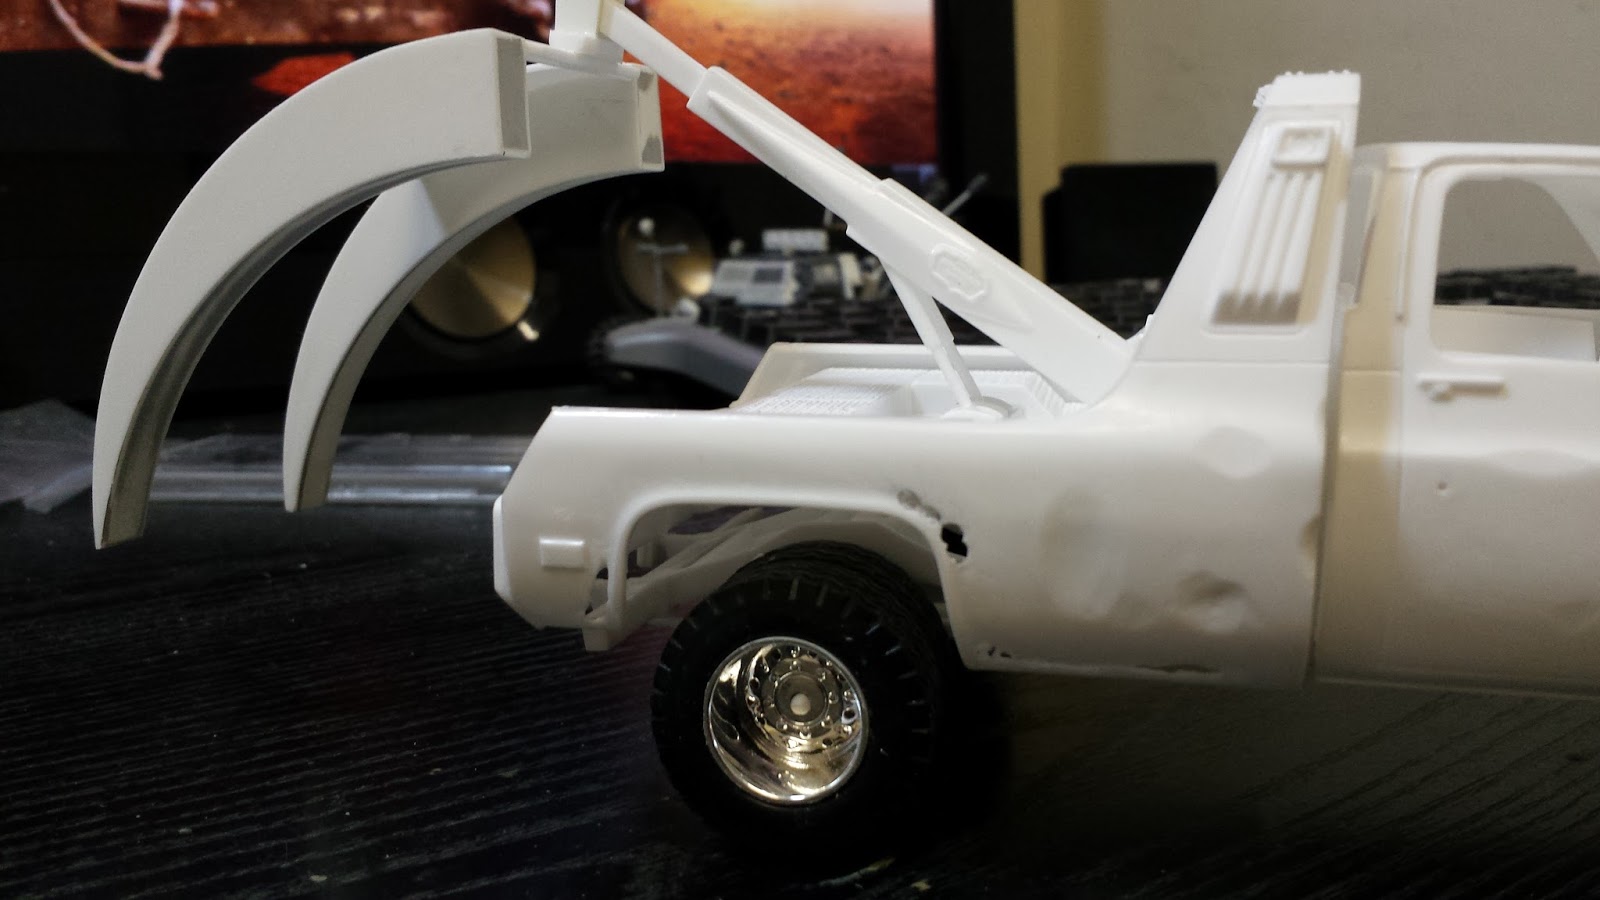
Time to change from cardboard to plastic. This one is based on one of the plough vehicles.
For this one I used the Revell 1977 GMC Wrecker.
All pretty much out of the box except scratchbuilt plough 'teeth'
Monday 2 November 2015
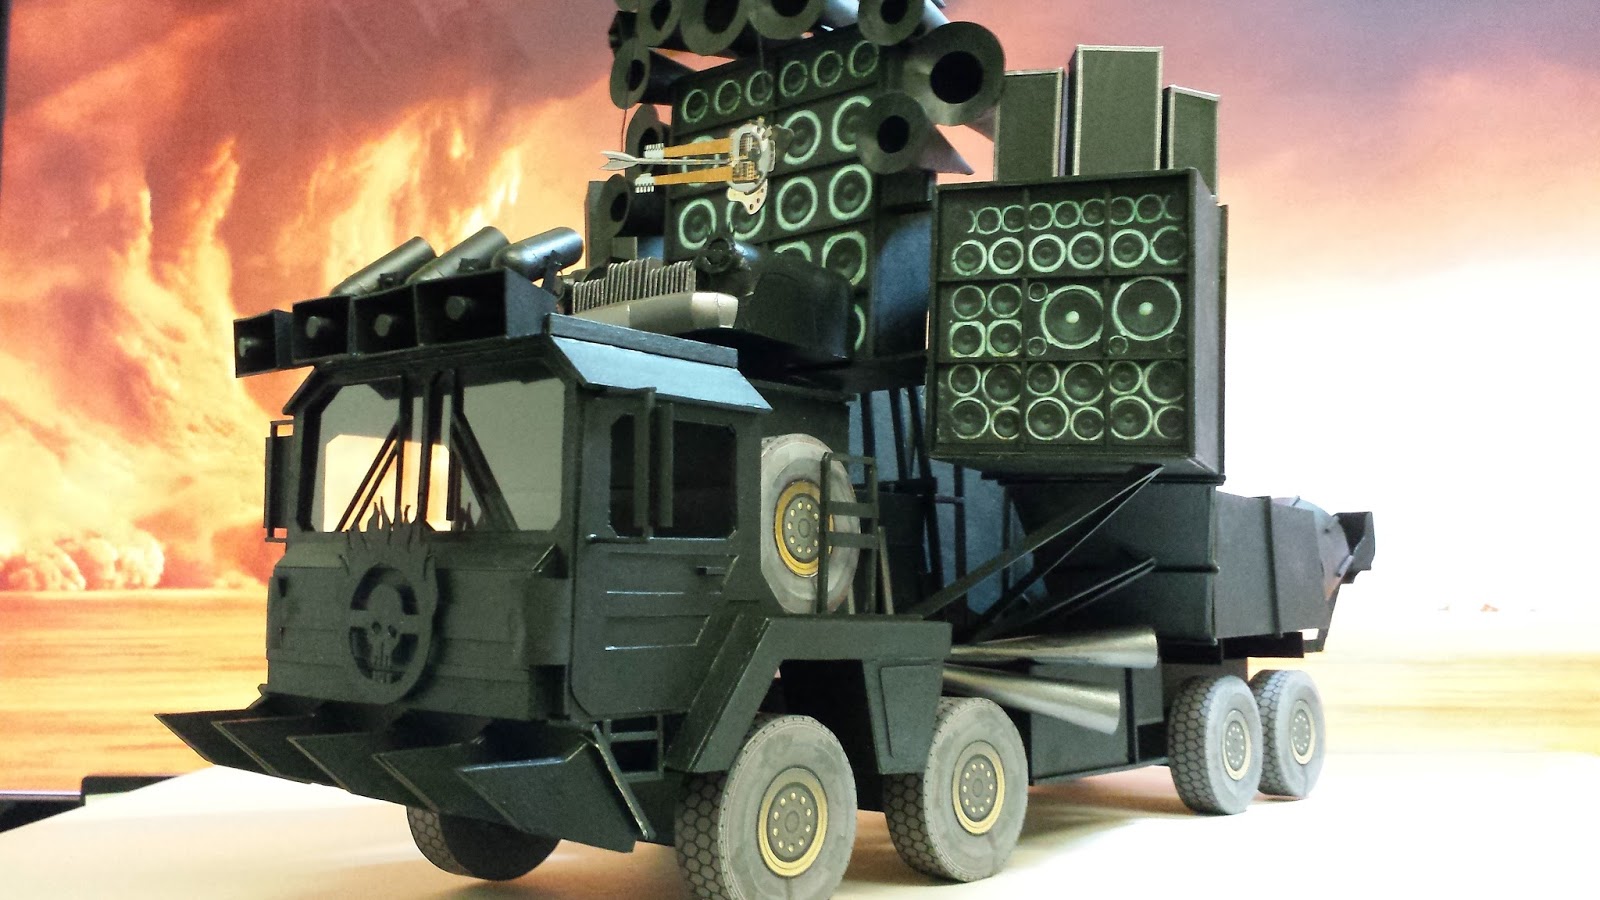
The 'Doof Wagon' is done......
.....all it needs now is a 'Doof Warrior'
Friday 30 October 2015
Quite possibly the most INSANE model I have ever built!!!
I never want to roll another paper cone in my life.
Seats added for the war drummers.
A couple of views of the other side. Fuel tank and spare wheel storage added.
View from above showing speaker and 'Doof Warrior' bungee support framework.
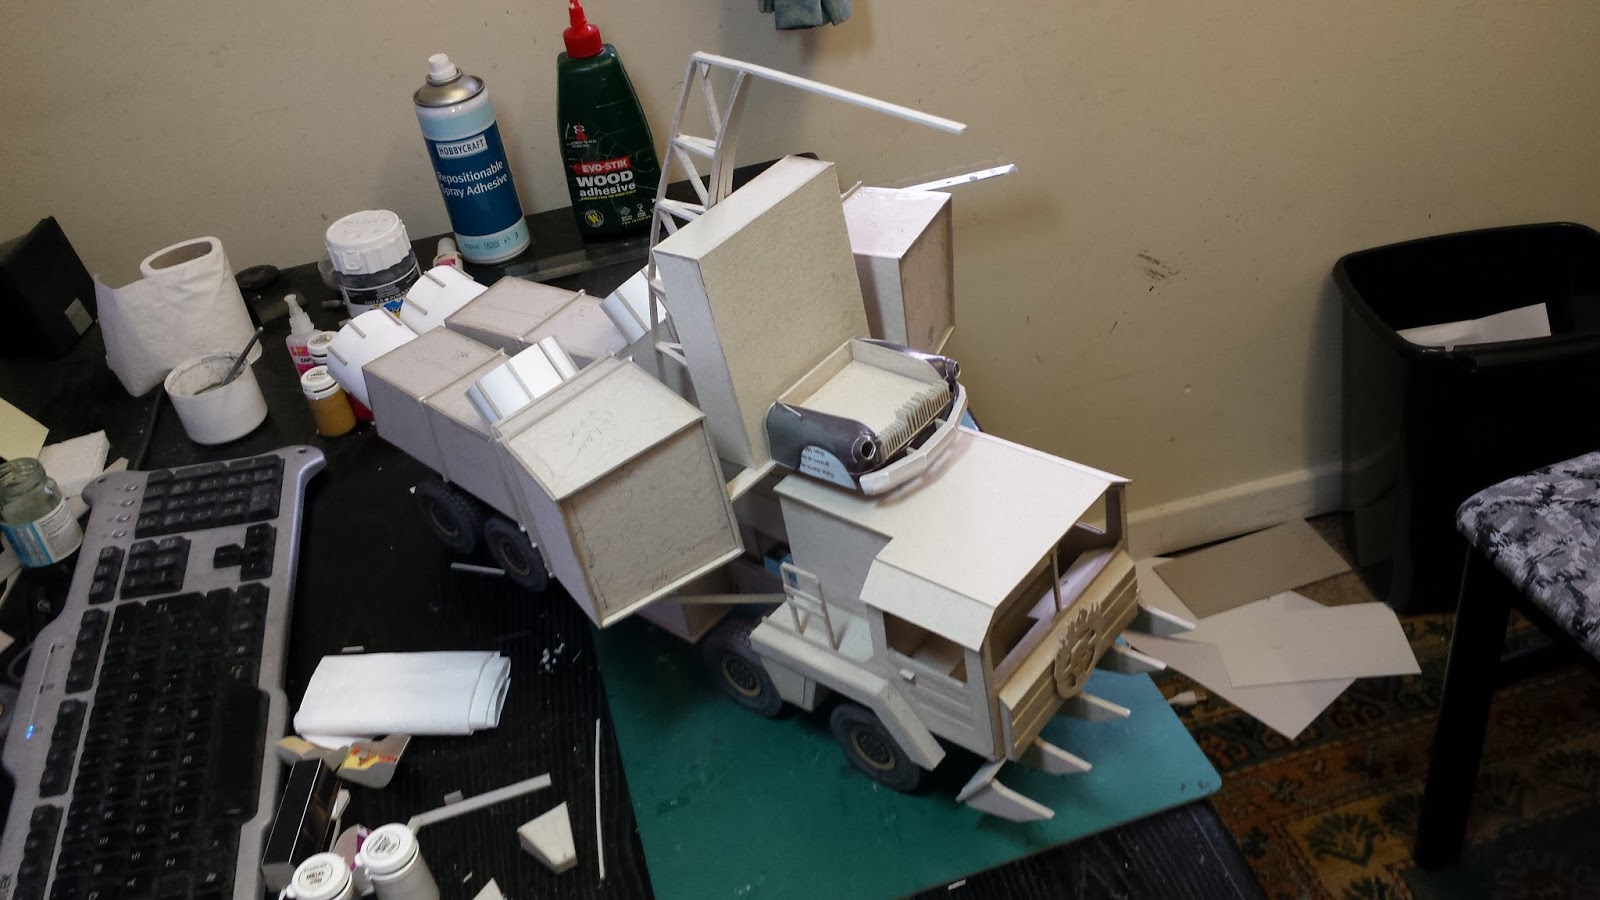
A couple of weeks into the build here. The cut-off car front end added as well as the ram and Immortan skull and flames logo on the front.
Auxiliary engine added behind the cab and the war drums added!
Stowage boxes underneath and the speaker support framework.
The 'Doof' takes shape. The chassis was made up from plans off the internet.
Wheels were from the 'War Rig' paper model available on paper-replika.com
Dimensions for the rest of the structure were just guesses as there are no plans online.
The shape of the drum ducts were purely guesswork!
Wednesday 28 October 2015
Can you guess who's next up?
Paintjob complete - still lots of small detail to do!
Weapons added. Windsheilds to do and trim and flags etc.
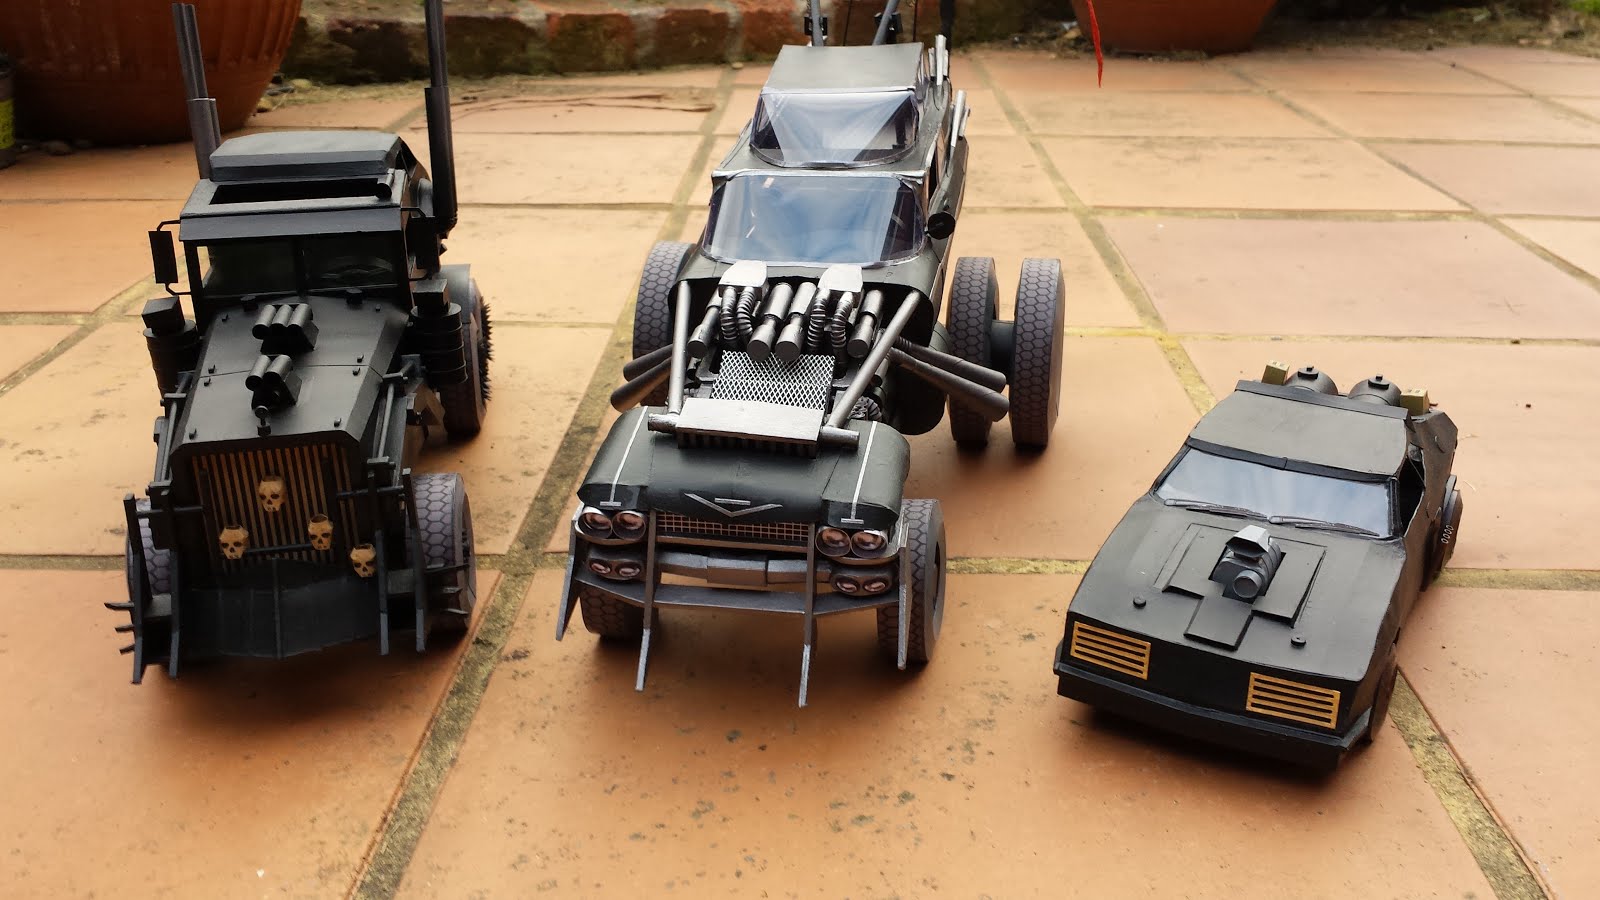
All done and posing with the other vehicles - showing the sheer size of the 'Gigahorse'!
"Witness Me!"
Front end in progress with the engine blocks in place.
Some creative thinking was required when it came to the engine.
All of the tubework and pipes came from the creative use of flexible drinking straws.
Well advanced shots of the basic 'Gigahorse'.
Luckily the bodywork was available as 'Ghostbusters Ecto 1'
templates built onto a custom chassis.
The War Rig donated tyre treads onto custom scratch built wheels.
Biggest problem - as always are the compound curves of the bodywork.
Monday 19 October 2015
Quite a quick build on this one - not much extra detail.
Most difficult part of this was the compound curves needed.
I might change the wheels on this one in the future.
Posing with the 'War Rig'
. Thoughts now turn to the next project....something bigger.....
....something with two of everything!!
After a lot of time researching, building and painting the 'War Rig' is up to a point I'm happy with.
Now I've built this one I obviously need the other vehicles.
Next up the 'Interceptor'
Air filters done with a few extra details.
Chevrolet Fleetmaster sedan body being fabricated for the rear.
A lot of internal bracing was used in this piece and a rear seat added for strength.
Thursday 15 October 2015
First up - the 'war rig' The printer ran out of ink so parts of it came out in purple! but, as I decided I would paint it - it didn't really matter.
At this point I also decided to add extra detail seen in the film but not on the card model. Small things like hinges, door handles and the interior.
Here is the basic chassis with the wheels almost complete.
Newer Posts
Home
Subscribe to:
Posts (Atom)